5 Classroom STEM Activities We Love
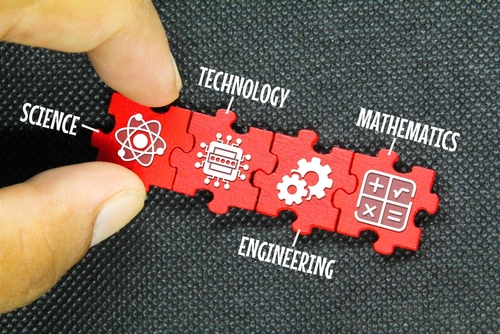
Science, technology, engineering, and mathematics, better known as STEM, education is an integral part of modern education. It prepares children to be future leaders, equipping them with the necessary skills and knowledge to succeed in a rapidly evolving technological world.
While standard STEM lessons might not be overly entertaining for the students, they don’t have to be boring. An abundant array of STEM activities can spice up your classroom, captivating your students’ attention and teaching them lessons that will stick with them through the years. Here are a few classroom STEM activities we love.
Make Homemade Slime
The gooey, slippery substance that is slime is a favorite among elementary students. It’s an excellent way to incorporate a sensory element to help keep students engaged and focused during lessons on how different ingredients interact and the chemical reactions that take place.
You can make a large batch of slime ahead of time if time and supplies allow, only making a small batch in class to demonstrate how everything reacts. Or, if supplies are limited, make a small batch in class and pass the finished product around to your students to let them feel the texture and consistency to solidify your lesson.
To make the slime, combine ½ cup of each water and glue in a mixing bowl. If you want to add color, add a few drops of food coloring at this point and stir it in. Mix in ½ teaspoon of baking soda, then pour in 2 tablespoons of contact lens solution. Stir the mixture until it pulls away from the edge of the bowl. The final product is not a liquid or a solid, often called a non-Newtonian fluid.
Build a Lemon Battery
Teach your students about a battery’s functions by using lemons’ power. You’ll need a few materials to get started, including:
- Four lemons
- Zinc covered nails
- Copper wire
- Alligator clips
- LED light
To power the light bulb, start by inserting the zinc-covered nail and copper wire into each of the lemons. The nail functions as the negative end, while the copper wire performs as the positive side. Once you have a piece of wire and a nail in each lemon, connect them with alligator clips in a copper-to-zinc pattern.
To light the bulb, connect the copper side to the longer, positive side of the bulb and the zinc nail side to the shorter, negative end of the bulb. And, tada! You have light!
Craft a DIY Lava Lamp
Learning about density doesn’t have to be boring. Spice up your lessons with a quick DIY lava lamp experiment to give students a real-life example of different fluids’ varying densities. Here’s what you’ll need:
- A clear glass or water bottle
- Water
- Vegetable oil
- Alka-seltzer
- Food coloring
Fill the cup halfway with vegetable oil, then pour water into the glass until it’s about ¾ of the way full. Next, add a few drops of food coloring. Feel free to add multiple colors to make an intriguing color combination.
Open your seltzer tablets and drop them in the cup. Break the tablet into pieces to slow the reaction, and add it in small parts at a time. Watch the bubbles rise and cause the colored water to move through the oil before dropping back down to the bottom.
Make a Magnet Maze
Learn about the properties of magnets using this fun activity, which involves a few magnets and a DIY maze. The simplicity of this activity makes it a perfect pick for younger children. Here’s what you’ll need:
- Cardboard or paper plates
- Magnets
- Paperclips
- Crayons, colored pencils, or markers
Draw a maze on a piece of cardboard or paper plate, complete with a starting and ending point. Once you’re done, position a paperclip at the starting point and place the magnet behind it to hold it in place.
As you talk about magnetic fields, showcase the magnet’s power by moving the paperclip through the maze. Reiterate that you’re not actually touching the paperclip – instead, the magnetic force grasps and maneuvers it through the maze. If you have varying strengths of magnets, you can demonstrate how the more powerful magnets can hold heavier objects or pull the paperclip from further distances.
Make a Paper Helicopter
Teach your students about the challenges of air pressure and lift by having them craft paper helicopters. NASA offers a downloadable template of its Mars helicopter, which makes for an entertaining activity to learn more about air pressure and lift.
Have your students carefully cut and fold the template as you teach them about factors impacting the helicopter. When they’re done, have them complete test flights and observe how the performance changes by adjusting various factors, like the height at which you drop it.
Get Creative STEM Activities for Your Students
Need more inspiration for fun STEM activities at different levels, complete with the lesson plans? If you want to dive into the intriguing world of STEM activities and how beneficial they can be for your students, our STEMvelope might be the perfect addition to your classroom. It’s adaptable and adjustable, featuring hands-on printable STEM activities to engage your students with fun learning.
Make tweaks along the way to keep your STEMvelope fresh and ready for your new year of students, even if you decide to teach a different grade. It works well for students ranging from 1st to 6th grade, so it can grow with you as you move to teach different grades.
Ready to kickstart an entertaining, collaborative, and interactive learning experience for your students with STEM classroom activities? Contact us today to get started!