The Ultimate Guide to Using a Heat Press

Are you looking for an easy way to customize your clothing and accessories? If so, a heat press might be the perfect tool for you! Not only is using a heat press simple, but it also provides quick results with amazing quality.

This comprehensive heat press guide will cover everything you need to know about operating a heat press safely and effectively to get the most out of every project. From detailed instructions on using a heat press to creative design ideas for fantastic projects, by the end of this guide, you’ll have all the knowledge necessary for turning ordinary materials into brilliant finished works!

What is a heat press and why should you use one for your project?

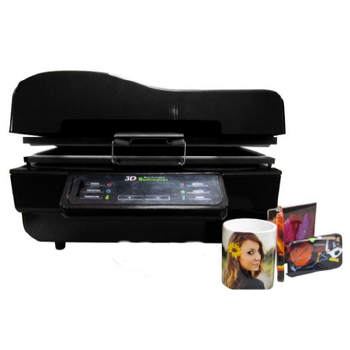
A heat press is essential for any DIY project where you must apply heat and pressure to create a design. It’s perfect for pressing designs onto fabrics, paper, wood, and glass.

Not only does it make creating unique designs easier, but it also ensures that your finished product has a professional finish every time. Heat presses use heated platens (plates) to transfer heat evenly and quickly onto whatever material you are working with.

The heating element is usually adjustable, so you can control the temperature depending on what kind of fabric or material you are using based on the standard easy-press heat guide. This makes it much easier than doing this manually with iron or another open flame source. Plus, the even heat distribution helps ensure that your design transfers perfectly.

Using a heat press also saves you time and money, as you don’t have to buy or use expensive printing equipment or materials. All you need is the correct type of paper for your material and some heavy-duty transfer paper for transferring designs onto fabrics.

After just one press, your project will be finished with a pristine finish every time! If you’re looking to create unique designs quickly and easily, a heat press is the way to go. Get creative and start pressing!

How to select the right type of heat press for education use

Once you’ve narrowed down the type of heat press, it’s time to consider which features are important for your educational use. There are a few key factors that you should evaluate before making your decision:

  • Size: Most presses come in various sizes, so choose the one that best fits your needs and workspace. For larger projects or multiple prints at once, look for presses with large plates and a wide opening for easy loading.
  • Temperature control: Look for presses with precise temperature control to ensure accuracy when applying transfers or other materials during production. This is especially important when working with more delicate fabrics like polyester or silk blends. Be sure to follow the heat press temperature guide.
  • Power: Check the wattage of any press you are looking at. You want a powerful press to handle your needs without overworking the motor or heating elements.
  • Ease of Use:Consider how user-friendly a particular heat press will be for your students and staff. Decide whether digital displays with multiple programmable settings would be beneficial or if a more basic setup with manual temperature adjustments would suffice.

The best materials to use with a heat press

Heat presses are a great way to make custom garments and products. There are plenty of options regarding what materials you should use with your heat press! Depending on your project, some materials work better than others.

Here’s an overview of the best materials to use with a heat press:

  • Cotton: Cotton is one of the most common fabrics used with heat presses and is highly recommended for T-shirts, hats, or any other items exposed to high temperatures. It provides good coverage and can withstand repeated uses without losing shape or color.
  • Polyester: Polyester works excellent when combined with other materials, such as cotton, since it offers extra durability and is more resistant to fading. It also helps with wrinkle resistance, making it ideal for any project requiring a lot of detail or intricate designs.
  • Acrylic: Acrylic fabrics are great for heat presses because they’re lightweight and flexible. They won’t shrink when exposed to heat, so you can create complex shapes without fear of warping. Plus, acrylics come in various colors and textures to choose from!
  • Spandex: Spandex is the perfect fabric if you need something form-fitting. Not only does spandex provide excellent stretch and movement, but it also allows air circulation, which makes it comfortable to wear all day long.

Creative ideas on how to use a heat press for educational purposes

Heat presses can be an excellent tool for educators looking to add a creative element to their lesson plans. These machines allow you to quickly transfer images and text onto fabric, making them perfect for creating classroom decorations, personalized t-shirts, and more!

Other uses you can use a heat press for to make learning fun and engaging include:

  • Make custom patches or badges with your school’s logo. This is an easy way to promote school spirit and give students something they can proudly wear on their uniforms or backpacks.
  • Use heat transfers to create science lab jackets for advanced biology classes. Students can show off their knowledge (and style) by decorating the jackets with symbols of various elements and molecules.
  • Have students create t-shirts with their designs to express and share their creative ideas in an art class.
  • Create fabric banners or flags to decorate your school’s hallways for a special event or holiday.
  • Make personalized “memory quilts” for graduating classes, complete with photos, drawings, quotes, and other meaningful mementos printed on squares of fabric.

These are just a few ways to use a heat press to make learning fun and engaging! With some creativity and imagination, you can come up with even more educational uses for this versatile machine. Get inspired!

Tips on how to properly apply pressure when using a heat press

For those new to using a heat press, it’s essential to understand how much pressure should be used when applying the vinyl or transfer. Too little and you won’t get the desired results; too much and you risk damaging your material.

Here are some tips on getting it just right:

  1. Start with light pressure until you feel the required force well. You can always add more as needed.
  1. Gently rock back and forth over the areas needing more coverage while maintaining even pressure. This will help ensure that all design parts come out evenly pressed on the fabric or substrate.
  1. Use a ruler or other precision tool to help you make sure that the pressure is level and even. This will also help guarantee that your design looks neat and professional.
  1. Always keep an eye on the pressure gauge and make sure that it remains within the recommended range for your material.
  1. If you’re working with thicker materials, use more pressure than usual to fully transfer all design parts onto the fabric or substrate.

We have the perfect heat press machine for your needs!

For a heat press machine tailored to educators’ needs, there is no better choice than AGC Education. Our heat presses are perfect for printing promotional materials, decorations, and more. With a wide range of designs and colors, you’ll find what you need!

If you’re looking for the most reliable heat press machine to stand up to your learning projects, look no further Than AGC Education. Contact us today and get ready to experience the power and versatility of a quality Heat Press Machine!

How to Learn 3D Printing – Ultimate Guide

Are you looking to add 3D printing skills to your repertoire? 3D printing is a rapidly growing technology that has made waves in the manufacturing industry.

It creates opportunities from prototyping to production and allows creative minds to explore new concepts and products. With its rise in popularity, more people are beginning to ask, “How hard is it to learn 3D printing?”

Fortunately, learning how to master 3D printing doesn’t have to be intimidating! We’ve compiled a comprehensive guide on everything you need to know about coming up to speed with this versatile technology.

Understand the Basics of 3D Printing Technology

3D printing technology has revolutionized the way parts and products are created. Using special software and hardware, it makes three-dimensional solid objects from a digital file. A 3D printer can produce complex shapes accurately and consistently, which was only possible after this technology became available.

3D printers use various materials such as plastics, metal, ceramics, or composites to build components layer by layer in a method known as additive manufacturing.

This allows for much greater control over the shape and integrity of the parts than traditional methods like machining or injection molding. The ability to rapidly prototype an object quickly and cost-effectively makes 3D printing ideal for prototyping applications and low-volume production runs.

How to Learn 3D Printing For Education Purposes

3D printing is a valuable tool for educational purposes. It can be used to create models, prototypes, and even furniture. With its unique capabilities, it can help students learn about different subjects engagingly.

Here are some tips on how to learn 3D printing for education purposes:

  • Know the Basics of 3D Printing: Before you start learning 3D printing, it’s important to understand the basics of the process and what it involves. Start by familiarizing yourself with the types of materials that can be used in 3D printing and the machinery involved with creating objects from those materials. Also, look into the software needed to design your object before printing.
  • Get Access to a 3D Printer: Once you understand the basics of 3D printing and know what kind of printer you need, it’s time to access one. You can purchase your own or borrow one from a library or community center.
  • Start with Simple Projects: To get comfortable with 3D printing, it’s best to start with simple projects. This will allow you to practice using the technology and understand it without worrying about complex designs.
  • Utilize Resources: Take advantage of online resources such as tutorials, forums, and videos that can help you learn more about 3D printing and any issues you might have with the process. You can also look into attending workshops or classes on 3D printing, where you can get in-depth instruction from experienced professionals.

How To Learn 3D Printing Design for Student Learning

3D printing provides an exciting opportunity for educators to help their students explore new learning opportunities. With 3D printing, educators can create custom objects and models to engage students in learning. Furthermore, 3D printing allows educators to quickly produce prototypes and other items to test students’ ideas.

Here are some ways that educators can learn 3D printing design for student learning:

Become familiar with the software tools available

Educators should familiarize themselves with 3D modeling and CAD (computer-aided design) software programs available for creating 3D prints. These programs allow users to develop complex plans printed with multiple materials. The more knowledgeable an educator is about the software, the better they can help their students create attractive 3D prints.

Read up on the basics of 3D printing

Educators should also take some time to learn about the basics of 3D printing and how it works. Knowing the fundamentals will help them understand 3D printing capabilities, material options, and other considerations when helping their students create designs for 3D printing.

Research online resources

Many great online resources are available that provide tutorials, tips, advice, and support for educators wanting to learn about 3D printing design for student learning. Reading blogs from experienced professionals in the field can be a great way to get started with creating exceptional designs for their students to explore. 

Participate in 3D printing courses

A variety of courses are available online and at universities that focus on teaching the fundamentals of 3D printing and design. Participating in these classes is an excellent way for educators to learn the basics and understand how to use them to help students develop their designs.

Benefits of Educators Exploring 3D Printing Designs

3D printing designs can open up a world of possibilities for educators. Through 3D printing, educators can introduce their students to exciting new concepts and foster creativity in the classroom.

Here are some of the key benefits of exploring 3D printing designs with your students:

  • Improved Creativity: By introducing 3D printing into the classroom, educators can help students become more creative and explore new ideas. With easy-to-use tools like Tinkercad or Sketchup, students can design their 3D models from scratch and print them out in just a few hours. This encourages creative expression through hands-on learning and helps develop problem-solving skills. 
  • Relevant Learning Experiences: Exploring 3D printing designs can provide students with real-world experiences they may not get in a traditional classroom setting. By creating their models, students understand how the physical world works and can interact with technology from an early age.
  • Accessible Learning: With access to 3D printing designs, educators can make learning more accessible for everyone. Students who might struggle to understand certain concepts or comprehend complex diagrams can now easily create visual representations of their ideas with 3D-printed models. This makes learning easier for all types of students and helps level the playing field for everyone involved.

Types of 3D Printing Designs Educators Can Use

3D printing designs can enhance a wide range of educational activities. From STEM curriculum to art classes, 3D printing can bring creativity and excitement into the classroom.

Here are some of the most popular types of 3D printing designs that educators can leverage for their teaching:

  • Educational Models: 3D printed models make it easier for students to visualize complex concepts such as anatomical structures, mathematical equations, or chemical reactions. Educators can also use these models to teach architecture or engineering principles interactively.
  • Prototypes: By using 3D-printed prototypes, educators can create real-life versions of virtual objects and show students how prototyping works in the development process. Students will be able to observe how changes in the design affect the prototype’s performance or shape.
  • Customized Tools: 3D printing can also create tools specific to a student’s need, like customized accessibility aids, prosthetics, and therapeutic devices. Educators can use this technology to teach students about problem-solving and customization.
  • Art Projects: 3D printing designs can provide an innovative way for educators to explore creative projects with their students. With this technology, educators can bring ideas to life in ways never before possible and allow their students to see their work displayed in museums or galleries.

Upgrade your classroom tech experience with 3D Printing

Learning 3D printing can be an exciting and rewarding experience. With the help of AGC Education, you can jump into learning 3D printing with confidence. AGC Education is dedicated to providing innovative professional technology solutions for educational institutions needing 3D printers.

With hands-on experience from our experts, you have access to the necessary materials and resources to become a pro in no time. We know there is so much potential in 3D printing, and we are determined to help you reach your goals.

In addition, we also offer exceptional technical support for any issues you may encounter along the way. If you are ready to take on the challenge of learning 3D printing, do not hesitate! Contact us today for access to the best educational tools and technology!

Best Beginner 3D Printers

Are you intrigued by 3D printing but need help figuring out where to start? Whether you’re just getting into 3D printing or want to upgrade your current setup, choosing the right printer for you can take time and effort.

Finding the best beginner 3D printer isn’t always easy – there are so many models out there with various features and capabilities that can make it challenging to decide which one is the right fit.

That’s why we’ve put together this helpful guide: below. We will discuss some of our favorite beginner 3D printers, helping you find a machine that fits your needs and expectations!

Top Rated 3D Printers for Beginners

When it comes to 3D printing, the right printer can make all the difference. As a beginner, you’ll want to find one that is both affordable and easy to use. To help get you started, here are some of the top-rated 3D printers for beginners.

Anycubic Kobra

The Anycubic Kobra is a 3D printer with excellent features at an incredibly competitive price. It includes automatic bed leveling, meaning the machine will level itself for you every time you start a print — no manual adjustments necessary.

Additionally, it has a direct extruder — so filament won’t jam and slow down your printing process — and a PEI-coated removable bed, making it easy to remove prints when finished. To top it all off, the Kobra has sensorless homing capabilities for precise movement during printing.

With this range of features at such an accessible cost point, the Anycubic Kobra is an ideal choice for anyone looking to try 3D printing for the first time. Its high-end features and low price make it an excellent option for newbies and experienced 3D printing enthusiasts. The Anycubic Kobra is a brilliant choice if you’re looking for unbeatable value for money.

Voxelab Aquila X2

The Aquila X2 has been designed with usability, featuring quick assembly and easy maintenance. It comes almost entirely preassembled, so it’s ready to print right out of the box. The printer also has an adjustable extrusion system that helps ensure a consistent filament flow for better print quality.

Moreover, the machine includes a heated build plate — great if you plan on printing materials like ABS or PETG — and a semi-enclosed design to help keep drafts away from your prints. It also features an onboard LCD control panel, allowing you to access all the various settings and functions without needing to connect to a computer.

Overall, the Voxelab Aquila X2 is an excellent value 3D printer, offering features and build quality usually reserved for more expensive machines. Its semi-enclosed design makes it a good choice for novice makers, while its adjustable extrusion system ensures it can handle more challenging materials. If you’re looking for your first 3D printer and don’t want to break the bank, the Voxelab Aquila X2 should be at the top of your list.

AGC Education IMAGIN3D – 3D Printer Package

The IMAGIN3D 3D Printer Package is a powerful tool for classrooms and educators. With its 12”x12”18”  printing platform, it can be used to create:

  • Topographical maps
  • Chemistry models
  • Miniature versions of famous structures

It also features a volcano extruder, allowing you to use a wide range of filaments such as PETG PLA, ABS, Flex, and Nylon.

But there’s more! After purchasing the IMAGIN3D printer package, you get STEM 3D – a resource kit for teachers designed to help make classroom learning easier. STEM 3D includes ready-made lesson plans and step-by-step guides on using the printer with your students, regardless of grade or subject.

If you’re looking for a professional-grade 3D printer that’s great for classrooms, look no further than AGC Education IMAGIN3D! With its large printing platform and STEM 3D resource kit, it’s an ideal tool to help bring learning to life in your classroom.

AGC Education IMAGIN3D JUNIOR- 3D Printer Package

The IMAGIN3D Printer Junior package also comes with easy-to-understand instructions and safety manuals, providing all the information you need to get started. Use this 3D printer for educational activities like engineering challenges and creative projects. With adjustable printing speed and layer thickness, the printer can be adjusted to match your classroom’s requirements.

IMAGIN3D also provides optional support packages to help ensure a smooth printing experience – from one-on-one assistance to repair services – as well as frequent software updates that offer improvements and new features.

Take advantage of the IMAGIN3D Printer Junior package today! Let your students explore their creativity while learning valuable STEM skills practically and engagingly. With the IMAGIN3D Printer Junior, you can help your students take their ideas from concept to reality in your classroom.

Bambu Lab P1P

The Bambu Lab P1P is an impressive 3D printer. Its large build volume of 256 x 256 x 256 mm and its direct dual-gear extruder can easily handle complex 3D printing jobs. Its magnetic textured PEI spring steel sheet bed lets you easily remove finished prints, while the purge chute allows for easy disposal of purge material from the back of the machine.

With the optional Automatic Material System (AMS) add-on, it’s possible to use up to four materials in one print job – making this an excellent choice for multi-material projects.

Tips When Shopping For A Beginner 3D Printer for Educators

When shopping for a beginner 3D printer for educators, it is important to consider the following tips:

  1. Cost and Budget: It is always best to know what you are willing to spend on a 3D printer before you start your search. Be sure to factor in the cost of any additional supplies or software that may be needed to purchase your machine.
  1. Print Quality: Your print quality will depend heavily on the type of 3D printer you choose, so make sure it can handle whatever type of projects or applications you intend to use. This includes materials such as plastic, metal, glass, and more.
  1. Ease-of-use: 3D printers can be complicated to use, especially for beginners. Look for a user-friendly machine with plenty of tutorials or online resources to help you learn how to operate it correctly.
  1. Warranty: Make sure the 3D printer you select comes with some sort of warranty, as this will ensure that any issues you experience will be taken care of promptly without any extra costs.
  1. Space Requirements: Be sure to measure the space available in your classroom or office before purchasing, as some 3D printers are rather large and may not fit where you want them to go.

Bring your educational goals into reality one step at a time

If you want to keep up with the rapidly evolving educational environment, 3D printing is the way to go. The technology can be cost-effective and highly efficient when incorporated into an academic setting. For simple 3D printing solutions that are perfect for beginners, AGC Education offers a wide range of high-performance 3D printers at competitive prices.

We can help you take advantage of an engaging learning experience for students – no matter the scale – our team has ready-to-go solutions that can make the most out of any available resources.

Don’t hesitate — contact us today, and we’ll provide you with the highest quality selection of beginner 3D printers available anywhere in the world. We can bring your educational goals into reality one step at a time.

Is Laser Engraving Hard to Learn?

Incorporating unique technologies can be a great way to capture students’ attention when finding new ways to engage them in the classroom. Laser engraving, while still relatively unknown compared to traditional methods of crafting and designing, is becoming increasingly popular daily. 

But what’s stopping educators from taking advantage of this versatile technology? Is laser engraving hard to learn? By understanding what laser engraving is all about and the steps you need to follow to start the process, you can easily find a way to enhance your future lessons by incorporating it into your school activities. 

In addition, you’ll gain a comprehensive understanding of what’s involved in setting up laser engravers in a classroom environment. You’ll also get some tips for managing different projects so everyone involved can reap maximum results, such as learning while having fun!

laser engraver

What is Laser Engraving?

Laser engraving is a printing method used to engrave permanent and deep marks. The process involves vaporizing the materials into fumes using a focused light beam. The localized area is hit with massive energy levels to create heat to vaporize the material’s surface.

Many people also know laser engraving as deep etching or relief printing. Even though it’s relatively new, many began to prefer it over other printing methods because it’s permanent and durable. Therefore, it can resist various harsh environments and fading or weathering.

Another advantage of laser engraving is that it can be used to make intricate designs with ease. Some examples are logos, patterns, designs, and texts. You can print them on different kinds of materials as well.

Here are the materials you can use for laser engraving:

  • Wood
  • Metal
  • Plastic
  • Fabric
  • Rubber

With this in mind, you might still wonder if is it hard to learn how to use a laser engraving machine. It’s simple to follow the step-by-step process while understanding how laser engraving works, which will be discussed below.

How Does Laser Engraving Work?

Laser engraving has the same process as sublimation regarding how the mark is made. Here, the material turns into a gas-vaporized state from the solid state without passing the liquid form. Generally, a solid turns into a liquid when the temperature reaches its melting point. Then from liquid to gas when the temperature reaches its boiling point.

With sublimation and laser engraving, the process is shortened through heating. And to engrave or leave a mark using laser engravers, a laser beam gives the energy needed to vaporize the material’s surface. And a laser engraving machine is equipped with these laser beam modules.

These laser modules can be engraved on different materials. And it works when the laser beam moves on the material’s surface. The beam raises the material’s temperature enough to reach its vaporization point. Thus, causing the material to convert into vapors while leaving a mark on the material.

Don’t worry about the fumes, which are collected through the machine’s extraction system. So this leaves you with a permanent and long-lasting result, which you can use for your school’s merchandise or various classroom projects.

The Step-by-Step Laser Engraving Process

There are some things you need to remember before you can start with your laser engraving project. And it’s best to teach your students at the same time so that they can get hands-on experience.

Here are the steps needed to start with laser engraving:

  1. Prepare: The first step is to prepare the material by cleaning it up. Ensure no oils, dirt, or debris are on the surface so the laser beam can engrave on the material properly.
  2. Design: Choose your design and upload it to the laser engraving software. You can use CAD or computer-aided design to create it.
  3. Calibrate: The calibration involves choosing the right settings for the material. You can start by adjusting the laser beam speed, focus, and power.
  4. Engrave: The engraving process begins once you upload your design and calibrate the machine. It’s when the laser beam emitted from the module is directed to the material. After that, there’s a shallow indentation, which the laser beam has left to create your desired design.

As you can see, operating the machine isn’t hard. It’s simple, and you can teach it to your students for a more engaging class. Thus, you can start with your projects by following these steps and understanding how laser engraving works.

Some Projects You Can Undertake in a Classroom Setting

So is laser engraving hard to learn? It will depend on several factors, such as the machine you plan on using and the materials you plan on using. But once you understand the basics and have a little bit of practice, laser engraving is easy to learn.

Once you’re ready to incorporate it into your classroom, you can begin by introducing some fun projects. Some examples are as follows:

Puzzles

Laser engraving is the perfect method for creating puzzles. You can have your students create a puzzle design or get their favorite piece of artwork, which they can engrave on a piece of plywood. After that, just cut the pieces using laser cutters.

Cutting Boards

For your arts and crafts class, you can introduce personalized cutting boards. Students must tape off the non-engraved area to prevent over-burn marks or ash dust. It’s best to choose lighter or unstreaked wood to develop a dark and fully-visible mark that’s visually appealing.

Customized Playing Cards

Your students can also create wonderful playing cards, which you can use for your games. Using cardstock or plastic, your students can design their playing cards with laser engraving.

Jewelry

Custom jewelry is an exciting project that students will love, especially little girls. You can help your students create custom wooden pendants, acrylic earrings, or metal bracelets. These can also be sold during school events or given to teachers as remembrance during Teacher’s Day.

School Decorations

You can invite your students to help create magnificent decorations during graduations, proms, or ceremonies. It’s a great way to provide a customized experience that’s unique and truly memorable. Plus, you can use laser engraving to create mementos for your students that signify their time in school.

Bookmarks

Bookmarks can be made in different materials, but choosing a sturdy material, such as a thin piece of plywood or bamboo, is best. Your students can use these practical objects to keep track of their progress in their reading activities.

These are just some of the projects you can introduce to your students. With laser engraving, there’s no limit to creativity. Plus, you can use these in different school curriculums, which means there are no limitations in terms of activities and projects. And with all these projects, students can enjoy the laser engraving process while they learn.

Apply Laser Engraving in You Classroom for More Fun

As an educator, you want your students to learn in different ways to prevent them from getting bored. And one way is to keep them engaged using different types of technologies, such as a laser engraver.

If you’re looking for a laser engraver that is easy to use, AGC Education has the Laser Lab, which will help you tackle your various classroom activities. Contact us if you have more questions about our laser engraving supplies; we’re happy to help you.