Best Beginner 3D Printers

Are you intrigued by 3D printing but need help figuring out where to start? Whether you’re just getting into 3D printing or want to upgrade your current setup, choosing the right printer for you can take time and effort.

Finding the best beginner 3D printer isn’t always easy – there are so many models out there with various features and capabilities that can make it challenging to decide which one is the right fit.

That’s why we’ve put together this helpful guide: below. We will discuss some of our favorite beginner 3D printers, helping you find a machine that fits your needs and expectations!

Top Rated 3D Printers for Beginners

When it comes to 3D printing, the right printer can make all the difference. As a beginner, you’ll want to find one that is both affordable and easy to use. To help get you started, here are some of the top-rated 3D printers for beginners.

Anycubic Kobra

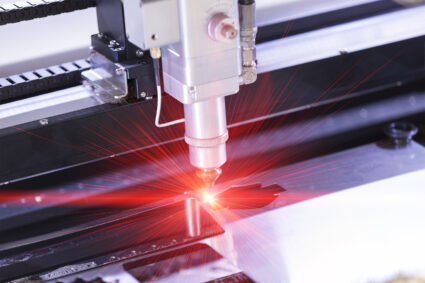
The Anycubic Kobra is a 3D printer with excellent features at an incredibly competitive price. It includes automatic bed leveling, meaning the machine will level itself for you every time you start a print — no manual adjustments necessary.

Additionally, it has a direct extruder — so filament won’t jam and slow down your printing process — and a PEI-coated removable bed, making it easy to remove prints when finished. To top it all off, the Kobra has sensorless homing capabilities for precise movement during printing.

With this range of features at such an accessible cost point, the Anycubic Kobra is an ideal choice for anyone looking to try 3D printing for the first time. Its high-end features and low price make it an excellent option for newbies and experienced 3D printing enthusiasts. The Anycubic Kobra is a brilliant choice if you’re looking for unbeatable value for money.

Voxelab Aquila X2

The Aquila X2 has been designed with usability, featuring quick assembly and easy maintenance. It comes almost entirely preassembled, so it’s ready to print right out of the box. The printer also has an adjustable extrusion system that helps ensure a consistent filament flow for better print quality.

Moreover, the machine includes a heated build plate — great if you plan on printing materials like ABS or PETG — and a semi-enclosed design to help keep drafts away from your prints. It also features an onboard LCD control panel, allowing you to access all the various settings and functions without needing to connect to a computer.

Overall, the Voxelab Aquila X2 is an excellent value 3D printer, offering features and build quality usually reserved for more expensive machines. Its semi-enclosed design makes it a good choice for novice makers, while its adjustable extrusion system ensures it can handle more challenging materials. If you’re looking for your first 3D printer and don’t want to break the bank, the Voxelab Aquila X2 should be at the top of your list.

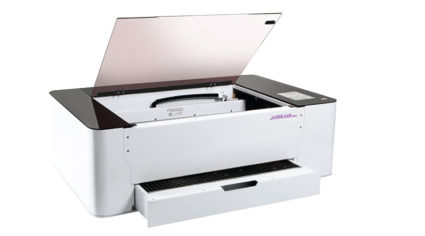
AGC Education IMAGIN3D – 3D Printer Package

The IMAGIN3D 3D Printer Package is a powerful tool for classrooms and educators. With its 12”x12”18”  printing platform, it can be used to create:

  • Topographical maps
  • Chemistry models
  • Miniature versions of famous structures

It also features a volcano extruder, allowing you to use a wide range of filaments such as PETG PLA, ABS, Flex, and Nylon.

But there’s more! After purchasing the IMAGIN3D printer package, you get STEM 3D – a resource kit for teachers designed to help make classroom learning easier. STEM 3D includes ready-made lesson plans and step-by-step guides on using the printer with your students, regardless of grade or subject.

If you’re looking for a professional-grade 3D printer that’s great for classrooms, look no further than AGC Education IMAGIN3D! With its large printing platform and STEM 3D resource kit, it’s an ideal tool to help bring learning to life in your classroom.

AGC Education IMAGIN3D JUNIOR- 3D Printer Package

The IMAGIN3D Printer Junior package also comes with easy-to-understand instructions and safety manuals, providing all the information you need to get started. Use this 3D printer for educational activities like engineering challenges and creative projects. With adjustable printing speed and layer thickness, the printer can be adjusted to match your classroom’s requirements.

IMAGIN3D also provides optional support packages to help ensure a smooth printing experience – from one-on-one assistance to repair services – as well as frequent software updates that offer improvements and new features.

Take advantage of the IMAGIN3D Printer Junior package today! Let your students explore their creativity while learning valuable STEM skills practically and engagingly. With the IMAGIN3D Printer Junior, you can help your students take their ideas from concept to reality in your classroom.

Bambu Lab P1P

The Bambu Lab P1P is an impressive 3D printer. Its large build volume of 256 x 256 x 256 mm and its direct dual-gear extruder can easily handle complex 3D printing jobs. Its magnetic textured PEI spring steel sheet bed lets you easily remove finished prints, while the purge chute allows for easy disposal of purge material from the back of the machine.

With the optional Automatic Material System (AMS) add-on, it’s possible to use up to four materials in one print job – making this an excellent choice for multi-material projects.

Tips When Shopping For A Beginner 3D Printer for Educators

When shopping for a beginner 3D printer for educators, it is important to consider the following tips:

  1. Cost and Budget: It is always best to know what you are willing to spend on a 3D printer before you start your search. Be sure to factor in the cost of any additional supplies or software that may be needed to purchase your machine.
  1. Print Quality: Your print quality will depend heavily on the type of 3D printer you choose, so make sure it can handle whatever type of projects or applications you intend to use. This includes materials such as plastic, metal, glass, and more.
  1. Ease-of-use: 3D printers can be complicated to use, especially for beginners. Look for a user-friendly machine with plenty of tutorials or online resources to help you learn how to operate it correctly.
  1. Warranty: Make sure the 3D printer you select comes with some sort of warranty, as this will ensure that any issues you experience will be taken care of promptly without any extra costs.
  1. Space Requirements: Be sure to measure the space available in your classroom or office before purchasing, as some 3D printers are rather large and may not fit where you want them to go.

Bring your educational goals into reality one step at a time

If you want to keep up with the rapidly evolving educational environment, 3D printing is the way to go. The technology can be cost-effective and highly efficient when incorporated into an academic setting. For simple 3D printing solutions that are perfect for beginners, AGC Education offers a wide range of high-performance 3D printers at competitive prices.

We can help you take advantage of an engaging learning experience for students – no matter the scale – our team has ready-to-go solutions that can make the most out of any available resources.

Don’t hesitate — contact us today, and we’ll provide you with the highest quality selection of beginner 3D printers available anywhere in the world. We can bring your educational goals into reality one step at a time.

Is Laser Engraving Hard to Learn?

Incorporating unique technologies can be a great way to capture students’ attention when finding new ways to engage them in the classroom. Laser engraving, while still relatively unknown compared to traditional methods of crafting and designing, is becoming increasingly popular daily. 

But what’s stopping educators from taking advantage of this versatile technology? Is laser engraving hard to learn? By understanding what laser engraving is all about and the steps you need to follow to start the process, you can easily find a way to enhance your future lessons by incorporating it into your school activities. 

In addition, you’ll gain a comprehensive understanding of what’s involved in setting up laser engravers in a classroom environment. You’ll also get some tips for managing different projects so everyone involved can reap maximum results, such as learning while having fun!

laser engraver

What is Laser Engraving?

Laser engraving is a printing method used to engrave permanent and deep marks. The process involves vaporizing the materials into fumes using a focused light beam. The localized area is hit with massive energy levels to create heat to vaporize the material’s surface.

Many people also know laser engraving as deep etching or relief printing. Even though it’s relatively new, many began to prefer it over other printing methods because it’s permanent and durable. Therefore, it can resist various harsh environments and fading or weathering.

Another advantage of laser engraving is that it can be used to make intricate designs with ease. Some examples are logos, patterns, designs, and texts. You can print them on different kinds of materials as well.

Here are the materials you can use for laser engraving:

  • Wood
  • Metal
  • Plastic
  • Fabric
  • Rubber

With this in mind, you might still wonder if is it hard to learn how to use a laser engraving machine. It’s simple to follow the step-by-step process while understanding how laser engraving works, which will be discussed below.

How Does Laser Engraving Work?

Laser engraving has the same process as sublimation regarding how the mark is made. Here, the material turns into a gas-vaporized state from the solid state without passing the liquid form. Generally, a solid turns into a liquid when the temperature reaches its melting point. Then from liquid to gas when the temperature reaches its boiling point.

With sublimation and laser engraving, the process is shortened through heating. And to engrave or leave a mark using laser engravers, a laser beam gives the energy needed to vaporize the material’s surface. And a laser engraving machine is equipped with these laser beam modules.

These laser modules can be engraved on different materials. And it works when the laser beam moves on the material’s surface. The beam raises the material’s temperature enough to reach its vaporization point. Thus, causing the material to convert into vapors while leaving a mark on the material.

Don’t worry about the fumes, which are collected through the machine’s extraction system. So this leaves you with a permanent and long-lasting result, which you can use for your school’s merchandise or various classroom projects.

The Step-by-Step Laser Engraving Process

There are some things you need to remember before you can start with your laser engraving project. And it’s best to teach your students at the same time so that they can get hands-on experience.

Here are the steps needed to start with laser engraving:

  1. Prepare: The first step is to prepare the material by cleaning it up. Ensure no oils, dirt, or debris are on the surface so the laser beam can engrave on the material properly.
  2. Design: Choose your design and upload it to the laser engraving software. You can use CAD or computer-aided design to create it.
  3. Calibrate: The calibration involves choosing the right settings for the material. You can start by adjusting the laser beam speed, focus, and power.
  4. Engrave: The engraving process begins once you upload your design and calibrate the machine. It’s when the laser beam emitted from the module is directed to the material. After that, there’s a shallow indentation, which the laser beam has left to create your desired design.

As you can see, operating the machine isn’t hard. It’s simple, and you can teach it to your students for a more engaging class. Thus, you can start with your projects by following these steps and understanding how laser engraving works.

Some Projects You Can Undertake in a Classroom Setting

So is laser engraving hard to learn? It will depend on several factors, such as the machine you plan on using and the materials you plan on using. But once you understand the basics and have a little bit of practice, laser engraving is easy to learn.

Once you’re ready to incorporate it into your classroom, you can begin by introducing some fun projects. Some examples are as follows:

Puzzles

Laser engraving is the perfect method for creating puzzles. You can have your students create a puzzle design or get their favorite piece of artwork, which they can engrave on a piece of plywood. After that, just cut the pieces using laser cutters.

Cutting Boards

For your arts and crafts class, you can introduce personalized cutting boards. Students must tape off the non-engraved area to prevent over-burn marks or ash dust. It’s best to choose lighter or unstreaked wood to develop a dark and fully-visible mark that’s visually appealing.

Customized Playing Cards

Your students can also create wonderful playing cards, which you can use for your games. Using cardstock or plastic, your students can design their playing cards with laser engraving.

Jewelry

Custom jewelry is an exciting project that students will love, especially little girls. You can help your students create custom wooden pendants, acrylic earrings, or metal bracelets. These can also be sold during school events or given to teachers as remembrance during Teacher’s Day.

School Decorations

You can invite your students to help create magnificent decorations during graduations, proms, or ceremonies. It’s a great way to provide a customized experience that’s unique and truly memorable. Plus, you can use laser engraving to create mementos for your students that signify their time in school.

Bookmarks

Bookmarks can be made in different materials, but choosing a sturdy material, such as a thin piece of plywood or bamboo, is best. Your students can use these practical objects to keep track of their progress in their reading activities.

These are just some of the projects you can introduce to your students. With laser engraving, there’s no limit to creativity. Plus, you can use these in different school curriculums, which means there are no limitations in terms of activities and projects. And with all these projects, students can enjoy the laser engraving process while they learn.

Apply Laser Engraving in You Classroom for More Fun

As an educator, you want your students to learn in different ways to prevent them from getting bored. And one way is to keep them engaged using different types of technologies, such as a laser engraver.

If you’re looking for a laser engraver that is easy to use, AGC Education has the Laser Lab, which will help you tackle your various classroom activities. Contact us if you have more questions about our laser engraving supplies; we’re happy to help you.

Everything You Need to Run a Laser Engraver

Are you looking for the perfect tool to help create beautiful materials that make learning more interactive and fun? Look no further than a laser engraver! 

Whether you are a teacher, school staff member, professor, or community organization leader, using a laser engraver brings endless possibilities for creative projects. From custom name tags to 3D letters and nostalgic wooden boxes, these high-tech tools offer an exciting way to produce exciting items quickly and easily.

If you want to start incorporating this type of technology in your classroom, you might wonder what is needed to run a laser engraver. Even though it’s a relatively new printing method, it’s still easier than other techniques. Plus, the things you need are easy to find. After that, you only need to find the right subject for this type of activity.

laser engraver machine

Understanding the Basics of Laser Engraving

Laser engraving leaves a mark on a material’s surface through a super-focused laser beam. It’s when vaporization happens when the laser’s heat leaves a permanent mark, which turns the solid material’s surface into a gas and releases fumes. The fumes are then extracted through an extractor system, such as a filtration unit or exhaust blower.

Since laser engravers are designed to be super easy to use, they can easily and quickly engrave your desired designs on different materials. The engravings are precise and accurate, making this the perfect tool for numerous arts and crafts projects. It’s also perfect for personalizing items like mugs, glassware, wooden boxes, and much more.

To get started, you must find out what equipment is needed to run a laser engraver, how to make it work, and any additional safety measures you must take. These will help you achieve a successful project with your students.

What You Need to Run a Laser Engraver

Apart from a laser engraver, there are other things you will need to start the process seamlessly. And it’s essential that you already have all of this additional equipment on hand before you begin to use them in the classroom to prevent any delays.

Equipment and items required for laser engraving:

Material

The first thing you need to do is to choose a material for the engraving. Ensure these are ideal for your laser engraving machine to prevent complications. It must also be the best material for your future projects, i.e. safe for classroom use.

Choose from the following materials:

  • Wood
  • Plastics and acrylics
  • Metal
  • Leather
  • Rubber
  • Fabric
  • Cardboard

Apart from choosing the suitable material, you must pair it with the correct settings for optimal results. For instance, you don’t want to choose a high power for soft materials like leather as it might burn the material.

Computer

You need a computer, where you’ll work on your graphics to create the design you plan on laser engraving on your chosen material. It’s where you will also configure the laser to meet the specifications and engraving results you wish to achieve, such as its power, speed, frequency, and focus.

Computer specifications:

  • RAM: The RAM of random access memory will determine the computer’s efficiency. The higher the RAM, the better the results of your laser engraver. It’s best to have 16 MB of RAM for laser engraving machines.
  • Processor speed: The suggested processor is i5 for faster processing speed.
  • Video card: Another critical component is the video card for smooth operation while working on heavier graphics.
  • Hard drive: The hard drive is the permanent memory of your computer, which is also responsible for keeping your engravings safe and stored until you need them. Make sure to get one that has a large storage capacity.
  • Software (operating system): Whether you plan on using Windows or OS, choosing an operating system compatible with your laser engraving machine is best.

Graphics Software

When working with a laser engraver, you need graphics software to send the graphics to the laser engraving machine. You must choose the software you’re familiar with while also being compatible with the laser engraver.

Some popular software includes the following:

  • Adobe Illustrator
  • Affinity Designer
  • Inkscape
  • Lightburn

Make sure to familiarize yourself with these graphics software because each has different capabilities and features to help you design.

Exhaust Fan

The exhaust fan will remove the odors and smoke the machine gives off. It’s also an essential tool for safety since it reduces sparks and flames while creating a safe environment. Ensure you have enough exhaust fans to keep the fumes away from people near the machine.

The result of a good exhaust fan is better quality since it also reduces the smoke residue in your system. Taking the time to install an exhaust fan can make a difference in a fume-free experience. Plus, you can choose from an exhaust blower or a filtration unit.

The exhaust blower is installed in the machine, drawing out the fumes from the machine and then blowing it out through the ducting. On the other hand, a filtration unit is a standalone exhaust unit that draws out the fumes from the area and passes through the filter, trapping harmful chemicals.

Optional Accessories

You can use many accessories with your engraver to expand your machine’s capabilities. These will help you complete more projects as you think of new activities in your classroom.

Optional accessories to consider:

  • Cutting grid: You can either order or make one for classroom use. Apart from engraving, some machines are also capable of laser cutting. It’s best to have a cutting grid to help you make straight cuts with the laser.
  • Rotary attachment: This particular accessory is excellent for engraving cylinders like pens or mugs. It rotates the material while it’s being engraved for a uniform result.
  • Air assist compressor: An air assist compressor prevents flare-ups while reducing residue. It also helps in helping the laser focus and burn material away by blowing a steady stream of air. It’s one of the most popular optional accessories to improve laser engraving outcomes.

Importance of Having Complete Equipment for Laser Engraving

Laser engraving is about more than just using one material and getting the desired results immediately. It also involves preparing the different types of accessories and components that can ensure your machine is running correctly.

Now that you know what is needed to run a laser engraver, you can achieve the best results possible and prevent any potential snags, especially in the classroom. Of course, you’ll want to ensure your students are safe from harm while doing the project.

For instance, you’ll need an exhaust fan to ensure they don’t inhale too much toxic fumes. Also, choosing the suitable material for the project will ensure that the laser engraving will turn out as expected.

Overall, having complete equipment for laser engraving is an essential part of the process. So if you want to have a fun and exciting time with your students, ensure you have everything you need beforehand.

Prepare for an Exciting Laser Engraving Experience at School

Knowing what you need apart from the laser engraving machine is the key to a successful project. Getting the right accessories and equipment makes a difference in outcome and safety. AGC Education has a long list of laser engraving supplies ideal for your school projects and activities. Our Laser Lab machine is the perfect choice for any educational environment. Don’t hesitate to contact us today if you have any questions. We’re more than happy to help you out.

Cool Laser Engraving Ideas for Your Classroom

Laser engraving has become an excellent option for teachers and educators to teach students how to become more creative. A laser engraver is a new tool that many schools are slowly trying to adapt in their classrooms for a better learning experience. Just like 3D printing, there are so many laser engraving ideas you can try out for your students to enjoy.

Let’s explore cool designs for laser engraving that will transform your classroom into a vibrant learning environment suitable for all ages. From engraved wood boards to customized stone tiles, we have plenty of options to bring inspiration and motivation to any space. Read on as we discuss some of our top picks for best laser engraving designs!

white laser engraver machine

What is a Laser Engraver?

Laser engravers are primarily used in manufacturing to improve traceability and product identification. However, schools are opting to use laser technology for many projects, such as wood laser engraving ideas.

And with the many uses and purposes a laser engraver can provide to educators and teachers, schools are starting to catch on and add it to their curriculum. The best part is it hones the creativity and imagination of students, primarily those in middle school.

But if it’s your first time using a laser engraver in your classroom, it can be challenging to introduce it. To give you an idea, you should come up with some cool laser engraving ideas for the students to get excited about.

Some Laser Engraving Ideas to Try in the Classroom

As we all know, students get bored easily when they’re in the classrooms, especially if there are no visual aids or activities. But one activity you can try out is creating laser engraving designs with a simple and easy-to-use laser engraver from ACG Education. Here are some ideas you can use:

Front view of printed on square puzzle frame

Create Gorgeous Puzzles

Creating puzzles is one of the most popular wood laser engraving ideas you and your students can tackle. Using a thin piece of plywood, the students can create their designs. After that, the laser engraver will engrave and cut these pieces out. Use your design as a template as the laser engraver cuts them out.

After that, you get a very well-made puzzle that you can enjoy. You can also ask them to create beautiful designs, which are ideal for puzzle pieces. And see which one is the best. It can become a simple contest in your classroom.

Cut Geometric Shapes During Your Math Lessons

Math is one of the most dreaded subjects that students don’t like. However, it’s crucial, especially for students who wish to become architects or engineers in the future. So if your lesson plan is focused on geometry, it’s better to laser engrave these shapes for your students to understand the topic.

And just like puzzles, you can ask your students to look for geometric designs for laser engraving that they can put together. Of course, they need to do the correct measurement to understand how it all connects to your math lesson about geometry.

Make Simple Cutting Boards

If you have cooking lessons, you can start by teaching your students how to create their cutting boards. With wood, they will have to create a design that makes their cutting board unique. They can also create these as a gift for themselves or their moms.

It’s worth noting to use tape to protect the areas you don’t want your students to engrave and then just dust the debris off accidentally. Make sure to choose lighter-colored wood for a well-defined result.

Learn About History By Cutting Out Shapes from the Past

In some countries, such as China, shadow puppet shows were popular theater forms that many people enjoyed. And if your current subject is shadow puppets, you and your students can laser engrave characters you can use for the show.

After that, you can work on the choreography and the story that will showcase what made it a hit in China. Remember, it’s accompanied by singing and dancing. So it’s best to prepare for it beforehand, and you can turn it into an event in your school that parents can attend.

Create Special Pieces of Jewelry

Your students who love to create something extraordinary that they can wear are another reason why you should consider laser engraving in your school. For instance, they can laser-cut different pieces of jewelry from acrylic or metal.

Therefore, they can make cute necklace pendants, earrings, and everything they want to try that is wearable. Of course, you will need to supervise them during these instances to prevent accidents or mishaps from happening.

Laser Cut Costumes During Plays

Instead of making a tree costume that can easily break, why don’t you try laser cutting each part and attaching it to one another for layers and added appeal? Your students can design their costumes for the show with a laser engraver. With this, you can get exceptional results without any trouble at all.

You can use it during events where your students must act as a particular character from your lesson, especially in English subjects. It allows your students to dress the part. Therefore, they’re inspired while they act out during the play.

brown letters on table

Simple Decorations in Your Classroom

You will want your students to feel the spirit during special occasions or events by adding some decor to your classrooms or the entire school. And with the help of a laser engraver, you can create simple but fantastic decorations that will make your school pop.

For instance, during the Christmas Holidays, engraving some snow or even Santa Claus that you can attach to your walls is best. Another occasion is Halloween, where you and your students can brainstorm what kind of designs are ideal for laser engraving that you can also put around your classroom for that Halloween spirit.

Bookmarks for Book Lovers

Students who love books will get the hang of creating bookmarks through laser engraving. You can use a thin piece of wood or a sturdy material. Your students can create a design that will tell more about themselves as book lovers. Some materials to use are as follows:

  • A thing plywood
  • Bamboo wood
  • Thick transparent plastic

You can also opt for bamboo wood for these bookmarks because they’re durable. Bookmarks are an everyday item that students use, so it’s best to add this to your list of projects to make using a laser engraver.

Opt for a Laser Engraver that Works with Your Curriculum with the Help of AGC Education

AGC Education offers some of the best school supplies that support educators and teachers to provide their students with the best education. One of these is laser engravers, which are a need in every school for an unforgettable and more technology-centered learning experience.

AGC Education provides laser engravers that work with your curriculum without any hassle. With the variety of materials it can work with, you and your students will surely enjoy it. So if you have any questions, don’t hesitate to contact us today. Or you can also email us at [email protected]!