How to Learn 3D Printing – Ultimate Guide
Are you looking to add 3D printing skills to your repertoire? 3D printing is a rapidly growing technology that has made waves in the manufacturing industry.
It creates opportunities from prototyping to production and allows creative minds to explore new concepts and products. With its rise in popularity, more people are beginning to ask, “How hard is it to learn 3D printing?”
Fortunately, learning how to master 3D printing doesn’t have to be intimidating! We’ve compiled a comprehensive guide on everything you need to know about coming up to speed with this versatile technology.
Understand the Basics of 3D Printing Technology
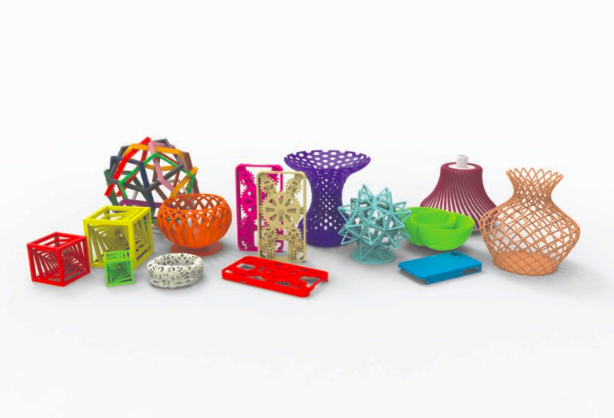
3D printing technology has revolutionized the way parts and products are created. Using special software and hardware, it makes three-dimensional solid objects from a digital file. A 3D printer can produce complex shapes accurately and consistently, which was only possible after this technology became available.
3D printers use various materials such as plastics, metal, ceramics, or composites to build components layer by layer in a method known as additive manufacturing.
This allows for much greater control over the shape and integrity of the parts than traditional methods like machining or injection molding. The ability to rapidly prototype an object quickly and cost-effectively makes 3D printing ideal for prototyping applications and low-volume production runs.
How to Learn 3D Printing For Education Purposes
3D printing is a valuable tool for educational purposes. It can be used to create models, prototypes, and even furniture. With its unique capabilities, it can help students learn about different subjects engagingly.
Here are some tips on how to learn 3D printing for education purposes:
- Know the Basics of 3D Printing: Before you start learning 3D printing, it’s important to understand the basics of the process and what it involves. Start by familiarizing yourself with the types of materials that can be used in 3D printing and the machinery involved with creating objects from those materials. Also, look into the software needed to design your object before printing.
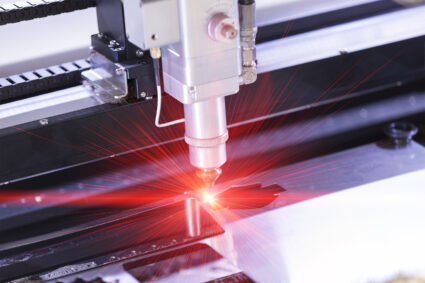
- Learn the Types of 3D Printing Technology: There are various types of 3D printing technology, such as fused deposition modeling (FDM), stereolithography (SLA), and selective laser sintering (SLS). Knowing the differences between each type will help you choose the one best suits your project.
- Get Access to a 3D Printer: Once you understand the basics of 3D printing and know what kind of printer you need, it’s time to access one. You can purchase your own or borrow one from a library or community center.
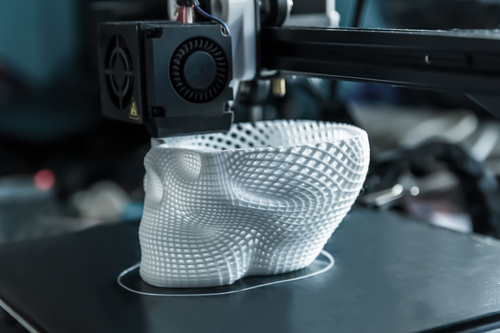
- Start with Simple Projects: To get comfortable with 3D printing, it’s best to start with simple projects. This will allow you to practice using the technology and understand it without worrying about complex designs.
- Utilize Resources: Take advantage of online resources such as tutorials, forums, and videos that can help you learn more about 3D printing and any issues you might have with the process. You can also look into attending workshops or classes on 3D printing, where you can get in-depth instruction from experienced professionals.
How To Learn 3D Printing Design for Student Learning
3D printing provides an exciting opportunity for educators to help their students explore new learning opportunities. With 3D printing, educators can create custom objects and models to engage students in learning. Furthermore, 3D printing allows educators to quickly produce prototypes and other items to test students’ ideas.
Here are some ways that educators can learn 3D printing design for student learning:
Become familiar with the software tools available
Educators should familiarize themselves with 3D modeling and CAD (computer-aided design) software programs available for creating 3D prints. These programs allow users to develop complex plans printed with multiple materials. The more knowledgeable an educator is about the software, the better they can help their students create attractive 3D prints.
Read up on the basics of 3D printing
Educators should also take some time to learn about the basics of 3D printing and how it works. Knowing the fundamentals will help them understand 3D printing capabilities, material options, and other considerations when helping their students create designs for 3D printing.
Research online resources
Many great online resources are available that provide tutorials, tips, advice, and support for educators wanting to learn about 3D printing design for student learning. Reading blogs from experienced professionals in the field can be a great way to get started with creating exceptional designs for their students to explore.
Participate in 3D printing courses
A variety of courses are available online and at universities that focus on teaching the fundamentals of 3D printing and design. Participating in these classes is an excellent way for educators to learn the basics and understand how to use them to help students develop their designs.
Benefits of Educators Exploring 3D Printing Designs
3D printing designs can open up a world of possibilities for educators. Through 3D printing, educators can introduce their students to exciting new concepts and foster creativity in the classroom.
Here are some of the key benefits of exploring 3D printing designs with your students:
- Improved Creativity: By introducing 3D printing into the classroom, educators can help students become more creative and explore new ideas. With easy-to-use tools like Tinkercad or Sketchup, students can design their 3D models from scratch and print them out in just a few hours. This encourages creative expression through hands-on learning and helps develop problem-solving skills.
- Relevant Learning Experiences: Exploring 3D printing designs can provide students with real-world experiences they may not get in a traditional classroom setting. By creating their models, students understand how the physical world works and can interact with technology from an early age.
- Accessible Learning: With access to 3D printing designs, educators can make learning more accessible for everyone. Students who might struggle to understand certain concepts or comprehend complex diagrams can now easily create visual representations of their ideas with 3D-printed models. This makes learning easier for all types of students and helps level the playing field for everyone involved.
Types of 3D Printing Designs Educators Can Use
3D printing designs can enhance a wide range of educational activities. From STEM curriculum to art classes, 3D printing can bring creativity and excitement into the classroom.
Here are some of the most popular types of 3D printing designs that educators can leverage for their teaching:
- Educational Models: 3D printed models make it easier for students to visualize complex concepts such as anatomical structures, mathematical equations, or chemical reactions. Educators can also use these models to teach architecture or engineering principles interactively.
- Prototypes: By using 3D-printed prototypes, educators can create real-life versions of virtual objects and show students how prototyping works in the development process. Students will be able to observe how changes in the design affect the prototype’s performance or shape.
- Customized Tools: 3D printing can also create tools specific to a student’s need, like customized accessibility aids, prosthetics, and therapeutic devices. Educators can use this technology to teach students about problem-solving and customization.
- Art Projects: 3D printing designs can provide an innovative way for educators to explore creative projects with their students. With this technology, educators can bring ideas to life in ways never before possible and allow their students to see their work displayed in museums or galleries.
Upgrade your classroom tech experience with 3D Printing
Learning 3D printing can be an exciting and rewarding experience. With the help of AGC Education, you can jump into learning 3D printing with confidence. AGC Education is dedicated to providing innovative professional technology solutions for educational institutions needing 3D printers.
With hands-on experience from our experts, you have access to the necessary materials and resources to become a pro in no time. We know there is so much potential in 3D printing, and we are determined to help you reach your goals.
In addition, we also offer exceptional technical support for any issues you may encounter along the way. If you are ready to take on the challenge of learning 3D printing, do not hesitate! Contact us today for access to the best educational tools and technology!