Classroom Sublimation Projects: Create Your Own Christmas Ornaments

Why sublimation print on blank ornaments as a class project? It’s a great way to connect your students to a centuries-old holiday tradition—with a creative, high-tech twist!

Did you know the earliest Christmas ornaments were created by German glassworks craftsmen in 1597? Most of the original decorations were glass fruit and nuts, warm reminders of summer to bring the evergreen tree through winter. 

Yet, tree ornaments only became truly popular 250 years later. 1857 was the year Hans Greiner, the great-grandson of those craftsmen, began selling “baubles”: colorful, spherical “bubbles” made of hand-blown glass. These round Christmas ornaments became a smash hit! 

Today, Christmas decor is an $8B industry, and ornaments come in all sorts of shapes, sizes, and materials. Glassworking skills might be a little out of reach for most kids, but sublimation printing is a fun way to create something new at a wide range of skill levels. 

Discover how to run a DIY ornament project that works for everyone, tailored to your particular classroom’s unique needs. 

How Kids Can Make Christmas Ornaments With Sublimation—In 5 Easy Steps!

There are many ways to engage students in a creative sublimation project. For this project, start by reflecting on a few questions, and use what you know about your classroom to weigh different options.

What Are the Best Types of Blank Ornaments To Personalize?

Consider how the ornaments’ colors, materials, and shapes affect the project. There are a range of options that will work on a technical level. Just make sure whatever ornaments you choose are compatible with the sublimation process.

Quick Review: How Does Sublimation Printing Work?

Sublimation printing uses a unique chemical process to transfer designs onto diverse objects. A design printed on sublimation paper, with sublimation ink, becomes gaseous when heated and pressed against an object’s surface. 

In gas form, the printed design integrates into the surface of a sublimation-compatible object. In essence, the vaporous ink dyes the object’s vinyl, polyester, or polymer-coated surface. The vapor dye transforms the colors of the particles or threads composing the object’s surface to reflect the design. 

The result is a smooth, single-layer surface, wholly embedded with the design. 

Process Differences Guide Material Choices

Sublimation differs from other methods of transferring prints. 

For example, heat transfer vinyl methods actually add a thin layer over top of the surface of the object receiving the transfer. The surface of the object itself is unchanged. This layer can chip or peel off over time, so heat transfer vinyl designs have a much shorter lifespan than sublimation printed designs.

In contrast, sublimation actually dyes the material composing the object’s surface, the sublimation ink mixes with the threads’ or particulates’ pre-existing color.

Ornament Color

When sublimation dye ink mixes with colored particulates, the resulting color differs from the one in the original design. Thus, you should only sublimate designs on white, transparent, or light-colored objects. Sublimating directly onto dark reds or greens just won’t work.

That said, there sublimation ornament blanks that incorporate festive colors. The key is making  sure those festive elements are outside the sublimation area. As long as the sublimation surface element of the blank ornament is white, the design will work. 

Ornament Materials

Likewise, the vaporous sublimation ink needs to connect with a compatible surface in order to dye it. Compatible surfaces are typically polyester or have a polymeric coating. Polymer readily absorbs the vapor. In contrast, glass, ceramic, and most natural fabrics repel the gaseous ink. 

There’s good news, though: you can find a wide range of blank Christmas ornaments designed specifically for sublimation. 

Some, like cast acrylic or vinyl blanks, are naturally compatible with the sublimation process. Others, like blank glass, wood, and metal ornaments, are also still viable options, as long as they have a sublimation powder coating. Fortunately, these options are available in an array of shapes and sizes. 

Ornament Shape

That brings us to shape. For most students, sublimation is easiest when they can press their design onto a flat surface. So, while attachments to sublimate onto spheres and cylinders exist, they aren’t the best choice for a class project. Instead, choose a flat, festive shape, like a snowflake, star, or tree

Age Group Considerations

When running projects for a diverse group of students, it’s important to adapt or personalize them based on the students’ ages and levels of skill. Consider each student’s:

  • Dexterity
  • Technological skill
  • Attention span
  • Personal preferences 

Some kids may be old enough and skilled enough to design, print, and press their ornament with minimal supervision. Others may require more one-on-one direction, or they may benefit from lighter-weight tools. [this mini heat press] requires less strength and dexterity to use than the conventional, large heat press.

Once you’ve thought through your options, it’s time to start the project!

Step #1. Get Your Materials Ready 

Any sublimation project requires a sublimation printer and a heat press. 

You might already have both set up in your classroom or maker lab. If so, that’s excellent! If not, try out our best sublimation printer and find out what the right heat press machines are for your space?

In addition to your gear, this project requires a few more materials. 

Materials

  • Sublimation inks
  • Sublimation paper
  • Sublimation blanks (i.e. blank ornaments with polymeric coating)
  • Rubbing alcohol or a similar cleaning agent
  • Cleaning cloths
  • Heat-resistant gloves
  • Cutting tool (optional)
  • Heat tape (optional)
  • Photo- or image-editing software
  • Scanner (optional)

Heat Press Prep Steps 

While you won’t use the heat press until Step 4, it’s good to look up the appropriate settings ahead of time. Your sublimation blanks (the blank Christmas ornaments), should come with printed information that explains the following:

  • Temperature. What temperature should you set your heat press to in order to sublimate onto the ornament?
  • Duration. During the heat press phase, how long should you press the design to the ornament?
  • Detailed Instructions. Is there a QR code or link to a video demo or more detailed instructions?

In some cases, there is no printed information. Instead, you have to go straight to the ornament manufacturer’s website. 

Missing Info? Learn Through Trial-And-Error

If you can’t find the information there either, then you’ll have to do a few trial-and-error tests. 

Try sublimating a basic, printed design onto a test ornament by heating your press to 360℉, then pressing for 60 seconds. If the design doesn’t transfer, increase the heat and duration in small increments and try again. 

Step #2. Create Art For Blank Ornaments 

Once you’ve gotten the supplies together, it’s time for students to create their designs. 

If they’re going to create the artwork for the ornaments digitally, using a program like Pixlr or Canva, skip ahead to Step #3. If, instead, they’re creating art with physical materials, and they’ll digitize them later, read on. 

Encourage kids to draw, paint, or collage photos from magazines to create the design for their ornament. They can use holiday imagery like snowmen or reindeer. Or, they can simply create images that depict something meaningful to them personally. 

Younger students might benefit from a life-size “template,” printed on regular paper, outlining their ornament’s borders. That offers a sense of the parameters their design has to stay within, to make sure it fits on their decor. 

Step #3. Scan, Upload & Edit (Design Phase)

Digitize Physical Works of Art

Once the students have completed their designs in physical materials, upload their pieces into an image-editing app. To do this, photograph or scan their pieces with a scanner. Make sure the resulting digital images have a resolution of 300 dpi sRGB (or greater). 

Save each student’s piece under their individual name, as a PNG file. Then, open the piece in an image editing app.

Editing For Print

At this stage, both students who created digital designs on creative apps, and students who made art with physical media and had it digitized, are ready to edit their image for print. 

Make sure the image is saved at a high resolution, so the design is sharp when printed on sublimation paper. Teach students how to:

  • Improve their design’s contrast
  • Crop or resize the image to fit the ornament
  • “Mirror” the design as a final step

Note that their design will be re-reversed, or oriented correctly, in the heat press phase. So, if they don’t mirror it before printing, it will be backward on the ornament. 

Save and Send

Save the final image as a PNG file. Then, send the image to the sublimation printer. 

Step #4 Print Unique Designs On Blank Christmas Ornaments 

Send the student’s PNG file to the sublimation printer. Make sure the printer is loaded with sublimation paper and sublimation dye ink. Regular ink and paper will not work!

Once the sublimation printer has inked the design on the sublimation paper, you can go straight to Step #5. That said, some students appreciate an additional step, to make the next step easier.

Optional: Cutting and Taping

Cutting and weeding aren’t necessary for sublimation. But, some students do prefer to cut out their printed design, so it has no borders. This lets them secure the printed design to the ornament with heat tape, keeping it stable and aligned more easily. 

If you go this route, make sure the inked side of the cut-out, printed design is the side facing the ornament’s surface. You can secure the design by taping the exterior edge of the ornament and design alike. 

Only use a few strips of tape; too much tape will make it harder to peel later. 

Step #5. Heat, Press, Peel, and Cool

Ornament Prep

Set the blank ornament on the flat tray of the heat press. Make sure the side you want to sublimate the design onto is facing up.

Lay the sublimation paper on top of the ornament, so the inked design is touching the ornament’s surface. While wearing heat-resistant gloves, press the paper flat against the ornament, preventing any wrinkles or bubbles.

Pre-heat the press to the optimal temperature, determined in Step #1. 

Press and Peel

Once the ornament is placed, close and press the ornament and printed design together. Maintain pressure for the recommended duration.

After pressing is complete, let the heat press cool. 

Once it’s begun to cool down, gently release the pressure from the ornament. Don’t let the release jostle the paper. As it becomes cooler, move quickly yet steadily, and peel the sublimation paper from the ornament.

Note: “Cool Peel” Paper

Some sublimation papers are labeled “cool peel.” If you use cool peel paper, then wait until the ornament is 100% cool before removing the paper.

If necessary, you can gently transfer the ornament to a separate cooling tray, to free up the heat press. To transfer, hold both the top and bottom of the ornament, to keep the paper in place until it’s ready to peel. 

This Christmas, Let All Makers Make Merry! Find Festive Projects For Your Maker Space And Beyond. 

Sublimation printing is an excellent method to make beautiful, long-lasting Christmas ornaments. Whether you use them as gifts or outlets for self-expression, these DIY projects make an impact.

At AGC Education, we believe in supporting and cultivating students’ creativity in every phase of life. That’s why we offer the technology to bring kids’ creative visions to life, and the support you need to make the tech work in your classroom. 
Call us at 1 (800) 535-7553 to learn more about our sublimation printing equipment, tools, and accessories. Or, use our online contact form to book a free, personalized consultation.

The Best Sublimation Printer for T-Shirts

Are you looking to make custom shirts with your personal designs and colors? To get professional-looking results, you’ll likely need the best sublimation printer for t-shirts. 

Below, we’ll examine some key factors when considering sublimation printers. Depending on your specific project and whether you want to make other custom items like mugs, bags, hats, or something else, you’ll also need different items and accessories. 

In other words, we’ll help you find the sublimation printer you are looking for and show you how to start your printing setup. 

How Does a Sublimation Printer Work? 

A sublimation printing machine uses a special type of ink that prints onto sublimation paper. Then, the ink is transferred from the paper to the item (in this case, fabric for t-shirts) with a heat press

Here are the steps of how it works: 

  1. Print your design onto the special sublimation paper. 
  2. The paper is placed onto the item (in this case, t-shirt) and heated with a heat press.
  3. The item absorbs the ink from the paper.
  4. The design is successfully transferred from the paper to the item. 

This process works well and creates some colorful, striking designs that don’t fade over time. 

Finding the Best Sublimation Printer for T-Shirts

When looking for the best sublimation printer for T-shirts, consider several things. Size, versatility, cost, design, ink type, maintenance, kits, warranty, and ease of use all come into play. Let’s break down what to consider with these critical points: 

  • Size: What size of designs will you be printing? You’ll need a printer that supports printing that size on t-shirt material. 
  • Cost: The price of sublimation printers can vary greatly, so to determine value, determine what you will be using the machine for, how long you intend to use it, and your overall budget. 
  • Ease of Use: Is the printer easy to set up and use? Can you learn quickly and do it yourself? Does it require any other technology? 
  • Versatility: Are you printing only t-shirts, or will you use it for posters, mugs, hats, or something else in the future? 
  • Kits & Bundles: Often, you can find a printer with start-up supplies or other materials needed for a convenient and quick start. 
  • Warranty: Is there a warranty? How long does it last? How are complications, repairs, and maintenance handled if you find yourself in those situations? 
  • Support & Training: Are there classes or tutorials to teach you how to start with the sublimation printer, make different designs/items, learn various skills, and get the most out of your machine? 

What is the Best Sublimation Printer for T-shirts? 

The Sublimation Station is an excellent printing machine for T-shirts. This all-in-one sublimation printer lets you quickly create custom designs for t-shirts, mugs, posters, bags, and other items. 

This sublimation printing machine provides a smooth finish for custom t-shirts and has enough versatility to become your go-to tool for all your custom printing needs. 

**PRODUCT IMAGE HERE**

It’s great for adding a personalized touch to your school stores, fundraisers, or other projects. The possibilities are endless! 

Here are some features that set the Sublimation Station apart: 

  • Full design software for unlimited creativity.
  • Approachable, user-friendly interface.
  • Bulk ink system for continuous, uninterrupted printing. 
  • Starter sublimation product kit with mugs, masks, and puzzles for practice.
  • Full support and training to get you started with confidence. 

Sublimation Printer Supplies for T-Shirts

To make sure you have everything you need to get started creating t-shirts with a sublimation printer, here’s a handy checklist of essential supplies: 

  • Ink: Make sure the printer has plenty of ink, and estimate how much you will need for the project. 
  • Sublimation Paper: You’ll need the right type (and amount) of sublimation paper that works with your machine. 
  • Blank T-Shirts: Choose the right type, size, and color of t-shirts for a smooth application. The AGC store carries a variety of shirts that work well with sublimation printing machines – available in youth and adult sizes.
  • Other supplies: Consider if other items would also be fun to design. This could be bags, mugs, cups, keychains, trophies, plaques, or other accessories. The possibilities are seemingly endless! 

What T-Shirts Should You Use With A Sublimation Printer? 

The ink used in the Sublimation Station transfers best onto 100% Polyester or a 50/50 fabric blend. Our sublimation supplies category has several examples of t-shirts that work well with a sublimation printer. The shirts come in different base colors and sizes (adult and youth). 

Is it Difficult to Use The Sublimation Printer?

The Sublimation Station has an easy-to-use interface, with a starter kit and implementation training. You’ll want to follow the training (which comes with the machine at no extra cost) and test out a few samples to get the hang of it, but it’s pretty intuitive after that! 

Also, AGC offers lifetime technical support. Over 90% of issues can be solved over the phone at no extra cost, but AGC provides on-site options if necessary.  

Everything You Need to Know About Making Sublimation Mugs

Have you ever wondered how to get cool, full-color designs on a mug? Using a sublimation machine is a popular way to get the best results with a long-lasting design that doesn’t chip or fade. 

So, what exactly are sublimation mugs, and what’s the secret to creating them? In the following sections, we’ll unveil these mysteries and share all the tips and tricks you need to achieve that perfect, professional finish. 

What Are Sublimation Mugs? 

Sublimation mugs are like ordinary ceramic or polymer mugs, but they have a special coating that makes it easy to transfer designs on them. 

To make that happen, you’ll need a sublimation printer that transfers special ink to sublimation paper. The paper is then placed on the sublimation mug, and a heat press transfers the design from the paper to the mug. 

Why Sublimation Printing For Mugs? 

A sublimation printing machine is a great way to put custom, full-color designs on mugs. Most people prefer this method because it provides a complete finish that is resistant to scratching and fading, as opposed to a sticker or another print solution. 

Here are some other top reasons for using a sublimation printer for mugs: 

  • Image Quality: The image quality seems better when using a sublimation machine, as the colors are more vibrant and the lines are sharper, making the design really “pop”! 
  • Precision: For complex images or those with a lot of color, sublimation printing captures those with high-resolution printing and sharp/clear detail. 
  • Efficiency: If you are making numerous mugs or other items, the sublimation printer can efficiently produce designs one after the other. 
  • Versatility: These Sublimation Stations are extremely versatile. You can create complex designs in any combination of colors. You can also use sublimation printers to create custom t-shirts, bags, keychains, posters, trophies, and more! 

How To Make Sublimation Mugs: 5 Steps 

The process of making sublimation mugs is straightforward once you have all your supplies ready to go. Here’s a brief overview of what it looks like: 

1. Gather All Sublimation Materials

This includes ordering everything and getting your sublimation printer setup. You will need the following materials and equipment to get started: 

  • Sublimation printer
  • Heat press
  • Sublimation mugs
  • Sublimation ink
  • Sublimation paper
  • Heat-resistant tape 

The sublimation printer and heat press are necessary equipment for making sublimation mugs. Also, getting the actual sublimation mugs is best instead of using just any mug. As mentioned earlier, the sublimation mugs have a special coating on the side to make the design stick better. 

To get started, you will also need sublimation ink and paper. The thermal sublimation tape isn’t a 100% requirement, but we highly recommend it, as it keeps your design in place when using the heat press. 

2. Prepare Your Custom Design 

You’ll want to find the perfect image, resolution, and orientation to be placed on the sublimation mug. Once you have it, follow these steps for best results: 

  • Double-check your image. Will the sizing look good on the mug? Is it a high-quality image? 
  • Flip the image if necessary. The image will be flipped during the transfer process, so consider that before printing. 
  • Print settings. Make sure your settings call for the “best quality” and any other customized details needed for your specific project. 

3. Print the Design 

Everything should be in place so you can print the design onto the special sublimation paper. Double-check that the print is of the highest quality and has no defects. Also, don’t be afraid to test multiple versions. A little experimenting can go a long way, especially if you are newer to sublimation printing. 

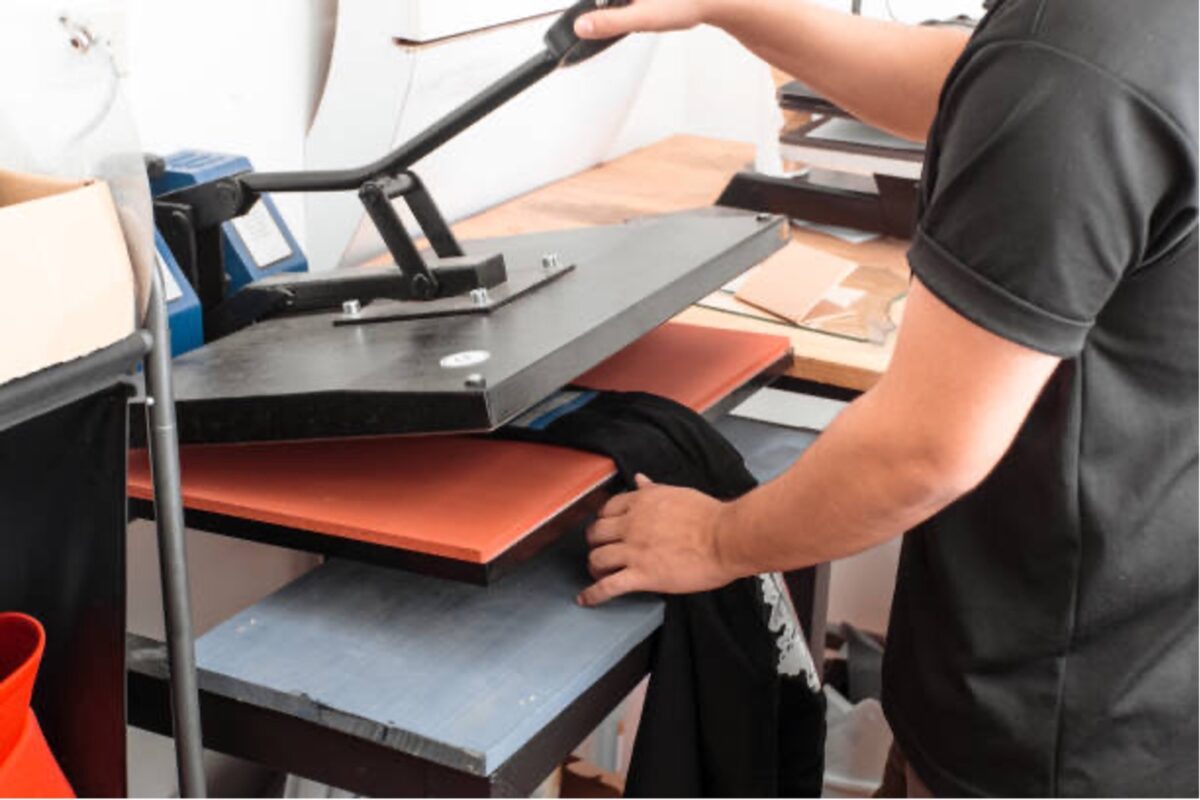
4. Transfer the Design 

Wrap the sublimation paper with your printed design around the mug. Make sure the image is positioned where you want it on the mug. This is where the thermal tape comes into play, as you will tape the paper to the sublimation mug to hold it in place. 

Now comes the heat press, which applies pressure and heat to transfer the ink from the paper to the mug. Follow the instructions regarding time and temperature, as these are some of the most important factors in the sublimation process. 

5. Final Details 

From here, remove the mug from the heat press and let it cool so the ink can set in fully. Check the finish’s quality to ensure there is no fading or smudges in the design. Check it from multiple angles in different lighting, and make sure the alignment is also to your preference.  

Tips For Making Sublimation Mugs 

If you are new to the world of sublimation mugs, here are some tips to remember when getting started: 

Start with a test. If this is your first time using a sublimation printer, there is a slight learning curve. They usually come with complete tutorials and samples to get started. We recommend practicing on those before jumping into more complex designs. 

Run through the full tutorial. There are several nuances to using a sublimation printing machine, so it’s best to read the full instructions to understand how it works. 

Get the right materials. This cannot be stressed enough. Finding the right sublimation supplies and using actual sublimation mugs will give you a much better and longer-lasting finish. 

Time and temperature are key. That is, when using the heat press. The standard when sublimating mugs is a temperature around 400 degrees for 3-5 minutes, but follow the manufacturer’s guidelines for best results. 

Where Can I Find the Best Sublimation Printer? 

AGC Education carries the Sublimation Station, an all-in-one printing machine that transfers bold and colorful designs to practically any item. 

It includes full design software, sample products, and complete implementation training to get started. For peace of mind, you also have access to AGC Education’s support team

Where Can I Get Sublimation Mugs & Supplies? 

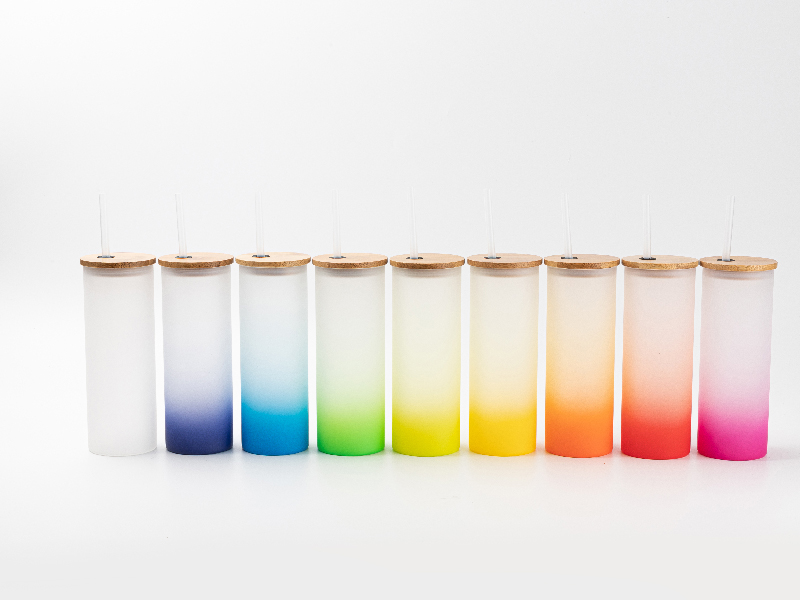
AGC Education has a complete catalog of sublimation supplies, including a range of sublimation mugs and cups in different styles, finishes, and colors. The store also has everything you need to get started: sublimation paper, tape, ink, and everything else you can think of. 

Transform Your Classroom Decor: DIY Projects with a 3D Heat Press

Have you ever imagined transforming everyday objects into personalized works of art? With a 3D sublimation machine, the possibilities for creative expression in your classroom decor projects are endless!

These innovative machines apply heat and pressure to transfer designs onto various objects, allowing educators and students to explore the magic of custom decoration. Keep reading to discover the uses of the 3d sublimation machine and how it can bring your DIY projects to the next level.

What is a 3D Sublimation Machine?

A 3D sublimation machine is a specialized heat press that uses sublimation technology to transfer designs onto objects with curved or irregular surfaces. Unlike traditional flat heat presses, which are limited to printing flat items such as t-shirts and mousepads, a 3D sublimation machine can handle three-dimensional objects like phone cases, ornaments, and awards.

The sublimation process uses heat to turn a solid dye into a gas, permeating the material and creating vibrant, long-lasting prints. This technology has been used for years in the textile industry but is now becoming increasingly popular among DIY enthusiasts. 

Sublimation provides ample space for unleashing creativity and crafting one-of-a-kind designs with vibrant full-color printing. Compared to other printing methods, such as screen printing or direct-to-garment printing, sublimation offers higher durability and versatility in design options.

Getting Started with Your 3D Sublimation Machine

Gather basic materials and tools before diving into your first project with your 3D sublimation machine to ensure a smooth start. You’ll need sublimation paper, ink, and objects with a special poly coating, such as phone cases or mugs, to transfer your designs onto. Ensure you have a reliable printer compatible with sublimation ink to print your designs accurately.

Safety should always be a priority when working with heat press machines. Ensure your workspace is well-ventilated to avoid inhaling fumes from the sublimation ink. Wear heat-resistant gloves to protect your hands from burns when handling hot objects and surfaces.

When setting up your sublimation printer, follow the manufacturer’s instructions carefully to ensure proper operation and safety precautions. Familiarize yourself with the controls and settings of the machine before starting your first project to avoid any mishaps.

With suitable materials, safety measures, and creativity, you’ll be ready to embark on exciting DIY projects and transform ordinary objects into personalized masterpieces with your 3D sublimation machine. If you’re new to this technology, start with smaller objects like phone cases and gradually work to larger or more complex items.

Step-by-Step DIY Projects

Embarking on your first DIY project with a 3D sublimation heat press may seem daunting, but with step-by-step guidance, you’ll be crafting like a pro in no time. Below, we’ve outlined some simple yet exciting projects to get you started and inspire your creativity.

Customized Pencil Holders

A fun and functional DIY project is creating customized pencil holders. This is an excellent opportunity for students to express their individuality while contributing to a more organized classroom environment.

Here are the steps to follow:

  1. These can be made from ceramic or specially coated plastic materials suitable for sublimation. Make sure that the pencil holders are prepped and ready for sublimation.
  1. Have students use graphic design software to create artwork or patterns. This can be integrated with color theory and graphic design lessons or even incorporate educational themes such as historical figures or scientific concepts.
  1. Print the student’s designs onto the sublimation paper using a sublimation printer. Ensure the design is mirrored so it transfers correctly onto the pencil holder.
  1. After trimming any excess paper, wrap the design around it and use heat-resistant tape to keep it in place. Then, using the 3D sublimation heat press, transfer the design onto the pencil holders following the machine’s time and temperature settings instructions.
  1. Allow the pencil holders to cool down after the sublimation process. Once safe to handle, remove the paper to reveal each holder’s vibrant, personalized designs.

Personalized Water Bottles

Water bottles are essential for students to stay hydrated throughout the day, and personalizing them adds a fun, creative touch that can also reduce the use of disposable bottles. If you’re looking for a practical and eco-friendly project, this is for you!

Here’s how to create personalized water bottles using a 3D sublimation heat press:

  1. Choose aluminum or stainless-steel water bottles that are specially coated for sublimation. Ensure they are clean and dry before beginning.
  1. Students can create personalized designs, maybe incorporating their name, favorite colors, or a subject they love, like space or botany.
  1. Transfer these custom designs onto sublimation paper with a sublimation printer, taking care to mirror the image for accurate application.
  1. Adhere the paper onto the water bottle using heat-resistant tape and process it through the 3D sublimation machine, following the recommended time and temperature settings.
  1. Once the sublimation is complete, let the bottles cool. Students can then enjoy using their uniquely designed water bottles, fostering a sense of ownership and pride in their creations.

Educational Door Signs

Creating door signs allows students to decorate the classroom while learning about design, typography, and sign-making. You can also extend this project to create signs for other parts of the school, such as the library or cafeteria.

Follow these steps to create door signs using a 3D sublimation machine:

  1. Begin with door sign blanks from sublimation-friendly materials like hardboard or reinforced plastic.
  1. Invite your students to design signs with classroom rules, welcome messages, or labels for different classroom areas.
  1. Print the designs onto sublimation paper using a mirror image setting to ensure the text and images will be directed correctly.
  1. Place the paper onto the sign blank, secure it with heat-resistant tape, and use your 3D sublimation machine to transfer the design onto the signs, adhering to the specified time and temperature.
  1. After the signs have cooled, they can be displayed on the door, providing a personalized touch to the classroom that showcases the students’ work and creativity.

Make sure to refer to your printer manual and the packaging of the paper for assistance in determining the correct side to print on and how to load it. These simple yet creative projects are just a few examples of the endless possibilities with a 3D sublimation machine.

Unleash Your Creativity and Personalize Anything

The creative possibilities offered by 3D sublimation technology truly are boundless. From pencil holders to educational door signs, the uses of the 3D sublimation machine are limited only by your imagination. In addition, you can use pre-designed templates or create your designs from scratch, giving you complete control over the final product.

As you explore the potential of your 3D sublimation machine, remember that the quality of your creations depends on the tools you use. Explore our products, including the sublimation printer, heat press machine, and high-quality sublimation paper. We’ve got everything you need to bring your creative ideas to life!